Overview
Project Configuration is where you set up and manage individual projects. Projects are workspaces that group traces, conversations, prompts, datasets, experiments, and evaluations. Each project has its own scope, users, roles, API keys, and retention settings.
What it is
Project Configuration gives you control over how projects work and who can access them. Use it to:
- Create and organize projects — Set up separate projects for different teams, environments, or use cases
- Manage project access — Control who can access a project and what roles they have
- Configure project settings — Set up trace filters, API keys, retention policies, and attribute visibility
- Track project changes — Review audit logs to see who changed what in a project
Tabs
The Projects Dashboard and Manage Project page provide different views:
| View | Purpose | Learn More |
|---|---|---|
| Projects Dashboard | Create, view, search, and manage all projects | See "What you can do" below |
| Manage Project | Configure users, roles, API keys, retention, and more for a specific project | Managing Projects |
What you can do
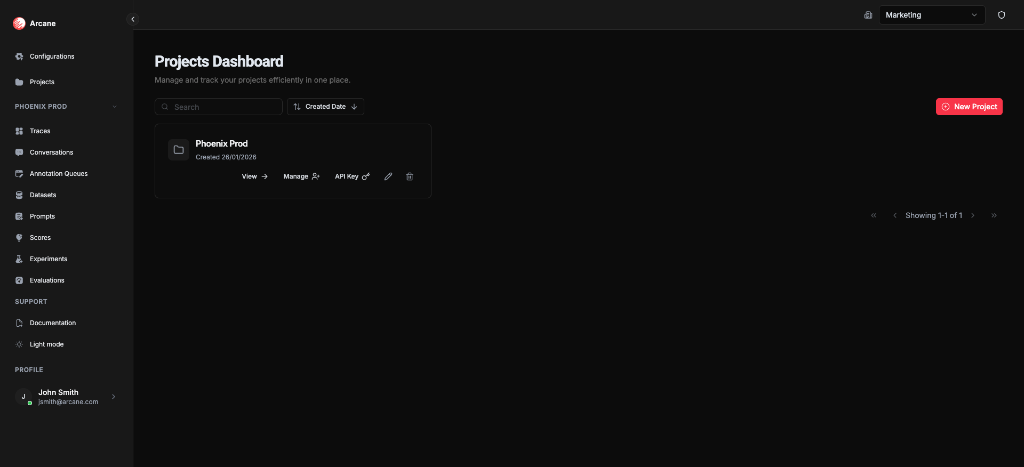
From the Projects Dashboard, you can:
- Create a project — Click New Project to set up a new workspace with a name, description, and optional trace filter
- View a project — Click View to open the project's default page (Conversations)
- Manage a project — Click Manage to configure users, roles, API keys, retention, attribute visibility, and audit logs
- Edit a project — Click the pencil icon to change the name, description, or trace filter
- Delete a project — Click the trash icon to remove a project (with confirmation)
- Search projects — Type in the search bar to filter projects by name
- Sort projects — Click "Created Date" to toggle sort direction
Creating a project
Click New Project to create a new workspace. The dialog lets you set:
- Name — Project name (required)
- Description — Optional description to help your team understand what this project is for
- Trace Attribute Filter — Optional filter applied to all trace searches in this project. If you set both Attribute Name and Attribute Value, every trace search will automatically filter spans by that attribute. Use this when traces from multiple projects share a datasource and you want to scope each project to its own attribute.
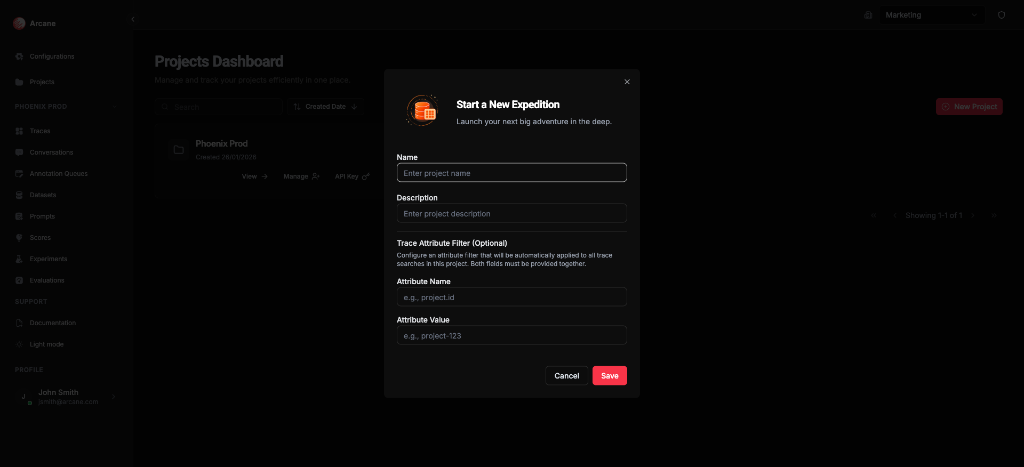
Tip: The trace attribute filter is useful when multiple projects share the same datasource. For example, if you have a project.id attribute on spans, you can filter each project to only show traces with its specific project ID.
Prerequisites
- Organization access — You must be a member of the organization
- Project creation permission — You need permission to create projects (typically Project Admin or Organization Admin)
Getting started
- Create your first project — Click New Project and give it a name. Add a description to help your team understand its purpose.
- Configure the project — Click Manage on your project to set up users, roles, API keys, and retention settings. See Managing Projects.
- Set up organization configuration — Before using the project, configure datasources, entities, and models at the organization level. See Organisation Configuration.
Related
- Managing Projects — Configure users, roles, API keys, retention, and more
- Organisation Configuration — Configure organization-level settings (datasources, entities, models, users, roles)
- Instance Administration — Manage organizations and instance administrators